

Thiebaud White Cake: Version 1.0
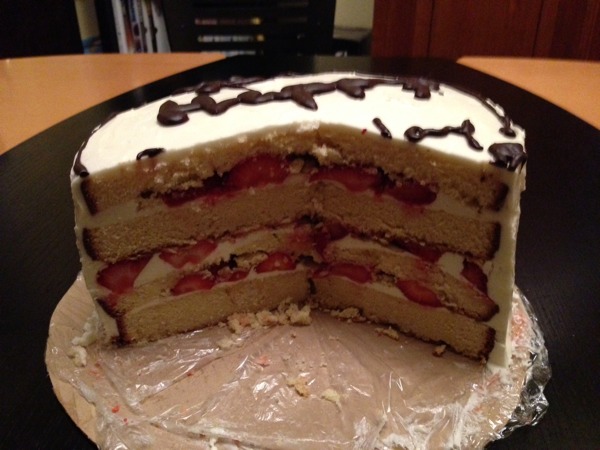
A few weeks back I bought the book Modern Art Desserts from Caitlin Freeman at the Walt Disney Concert Hall. For my son’s birthday I decided to bake the Thiebaud White Cake. As you can see here it come out alright:
2. How I did it
Making the cake took way longer than expected even though I knew that it takes quite some time to finish a layered cake. So first I made the cake but when I baked it the cake did not rise enough to create four layers. So I made a second cake which rose a little bit higher but still created the unwanted dome shape. Then I made the Italian Buttercream which turned out good even though denser than expected. A few days later I created the macerated strawberries and the sirup. FInally I cut the two cakes in two layers each and cut off the dome shaped top, warmed up the butter cream and assembled the cake. Buttercream is like plaster where any rough surfaces or imperfections can be filled up and covered over.
3. Lessons Learned
3.1 Cake
I still don’t know how to make a good, fluffy and level cake. The first cake came out bad because I forgot the sugar and when I added it later the batter did not look good and so it was not a surprise when it did not rise well. The second then looked great and it rose good in the beginning but in the second half of the baking the edges fell down and I got a high dome which meant I had to cut of a big chunk of the cake.
I have another recipe which uses whipped egg whites to make it rise rather than baking powder. Next time I will try this instead.
But maybe it is just my lousy oven that is responsible for the problems or my baking skills. One thing I might want to try is to cover the cake pan with aluminum foil to avoid a draft. I guess the only thing that helps is to try again until I succeed.
3.2 Butter Cream
Making the Butter Cream worked well until I had to add the butter at the very end. The cream deflated and became dense when I had all the butter added. Even though I took the butter out of the refrigerator early and cut it into pieces it still was cold inside the cubes. In another recipe they whip the butter and add it in one step to the base. The whipped butter has a more uniform temperature, is soft and when added all together it is much faster done.
3.3 Macerated Strawberries
The recipe asks for way too many strawberries. I just used about half of them. One problem I ran into is that the strawberries were too big, not soft enough and so messed up my cake layering. Next time I will slice the strawberries evenly so that when I place them between the layers they berries are a good and level foundation for the next layer.
3.4 Assembly
Next time I’m going to cut the cake into layers using a strong thread instead of a knife. This way I should get more even and equal thick layers. I also will use a decorating bag to build the wall at the edge of a layer to keep the strawberries and their juice inside.
The biggest lesson I learned is to make sure that the strawberries create an even and not too thick layer in between the cake layers otherwise the cake becomes uneven and therefore hard to finish and decorate. Also the top layer can break if bend. My cakes were broken anyhow because of their dome shape when left cool off inverted but a bend can make them break even more.
Another lessons is that there is nothing like too much butter cream. Until I am getting good at creating such cakes I will make at least one quarter more butter cream than the recipe asks for. The butter cream can help to glue pieces together, to even out gaps and to cover up mistakes.
Conclusion
Some of the instructions in the book are misleading making me confused (like the preparation of the Butter Cream) and at other steps I would like to have more instructions. For sure the recipes are not for beginners and require some expertise in baking and making butter creams etc. On the other hand only making cakes will give me the experience I need to become better at it.
— Andy
Markdown, Syntax-Colored Source Code
In this post I want to see if I can use Markdown and Blog Text in order to have syntax colored source code.
Source Code
This is an inner Java Class:
private static class LogLevelConfig {
    private LogLevel mLogLevel;
    private Pattern mModelIdGlobPattern;
    private Pattern mModelTitleGlobPattern;

    public LogLevelConfig( String pModelIdGlob, String pModelTitleGlob, String pLogLevel ) {
        if( pLogLevel == null || pLogLevel.trim().length() == 0 ) {
            mLogLevel = LogLevel.debug;
        } else {
            try {
                mLogLevel = LogLevel.valueOf( pLogLevel );
                LOG.info( "activate(), given log level found: {}", mLogLevel );
            } catch( Exception e ) {
                throw new IllegalArgumentException( "no log level found for: '" + pLogLevel + "'" );
            }
        }
        if( pModelIdGlob != null && pModelIdGlob.trim().length() > 0 ) {
            mModelIdGlobPattern = Pattern.compile( pModelIdGlob );
        }
        if( pModelTitleGlob != null && pModelTitleGlob.trim().length() > 0 ) {
            mModelTitleGlobPattern = Pattern.compile( pModelTitleGlob );
        }
    }

    public LogLevel getLogLevel() {
        return mLogLevel;
    }

    public boolean matchWorkflowModel( WorkflowModel pWorkflowModel ) {
        boolean lReturn = true;
        if( mModelIdGlobPattern != null ) {
            lReturn = mModelIdGlobPattern.matcher( pWorkflowModel.getId() ).matches();
        }
        if( mModelTitleGlobPattern != null ) {
            lReturn &= mModelTitleGlobPattern.matcher( pWorkflowModel.getTitle() ).matches();
        }
        return lReturn;
    }
}
This is now the same code in Markdown:
private static class LogLevelConfig {
    private LogLevel mLogLevel;
    private Pattern mModelIdGlobPattern;
    private Pattern mModelTitleGlobPattern;

    public LogLevelConfig( String pModelIdGlob, String pModelTitleGlob, String pLogLevel ) {
        if( pLogLevel == null || pLogLevel.trim().length() == 0 ) {
            mLogLevel = LogLevel.debug;
        } else {
            try {
                mLogLevel = LogLevel.valueOf( pLogLevel );
                LOG.info( "activate(), given log level found: {}", mLogLevel );
            } catch( Exception e ) {
                throw new IllegalArgumentException( "no log level found for: '" + pLogLevel + "'" );
            }
        }
        if( pModelIdGlob != null && pModelIdGlob.trim().length() > 0 ) {
            mModelIdGlobPattern = Pattern.compile( pModelIdGlob );
        }
        if( pModelTitleGlob != null && pModelTitleGlob.trim().length() > 0 ) {
            mModelTitleGlobPattern = Pattern.compile( pModelTitleGlob );
        }
    }

    public LogLevel getLogLevel() {
        return mLogLevel;
    }

    public boolean matchWorkflowModel( WorkflowModel pWorkflowModel ) {
        boolean lReturn = true;
        if( mModelIdGlobPattern != null ) {
            lReturn = mModelIdGlobPattern.matcher( pWorkflowModel.getId() ).matches();
        }
        if( mModelTitleGlobPattern != null ) {
            lReturn &= mModelTitleGlobPattern.matcher( pWorkflowModel.getTitle() ).matches();
        }
        return lReturn;
    }
}
How I did it
First I must make sure that Markdown is ignoring my Blog Text Code snippet by enclosing the entire Code into a <div> block and then use the Blog Text syntax to define the code block which is are 3 cutely brackets together with the attribute lang defining the source code language for the Syntax Coloring. When I wanted to display the Markdown version of the Source Code I had to use the Blog Text No-Parse tags (two curly brackets followed by two exclamation marks). But if I use Blog Text then I will use only Blog Text for source code and not both.
The only downside of that all is that Markdown preview displays just a blob of text. Still the code is not infused with HTML making it impossible to read and without the additional work to convert the code every time to HTML.
— Andy
Seriously Apple?
Last week my wife was complaining that the Apple TV had problems streaming her videos over Airplay. Eventually it turned out that the Airport Express (2012) was not working anymore. I used it to extend the wireless network because my Airport Extreme cannot reach the living room. The only problem was that I had no clue why it suddenly stopped nor did anything in the Airport Utility indicate any problems except that it stated it could not extend the network.
After a long googling session I seemed that the Airport Utility 6 had one flag missing – the one to allow to extend the network. Even if that is true I still have no idea why this stopped now because I upgraded to Airport utility 6 a while back. I also read that the only way to fix it is to install Airport Utility 5.6 but that is only available for Lion and I am running on Mountain Lion. A downgrade failed and so I was nearly giving up.
Eventually I found an Automator script that would allow me to install 5.6 by extracting it manually. On my MacBook Air it failed because on that machine the default extraction tool in not the Archive Utility but BetterZip. Copying the entire stuff over to another box and voile it worked. Then I only had to make a small change and update the Base Station (Airport Extreme) and voila everything worked again.
Looking at the post inside the Apple Community about this issue this seems to be quite old (September 22nd 2012). So, I am wondering what the heck Apple is doing. Why can this flag not be added to Airport Utility and if not why is Airport Utility 6 suddenly make extending the network fail.
So much for “it just works” – Apple
Kaleidoscope: Not For Pros?!
One of the more challenging tasks when developing software is to compare folders to see what has changed to an earlier version. So far the only decent tool that does that quickly and efficiently for the Mac is DeltaWalker. It does a good job but it could been faster especially when the application loads. So when I heard that Black Pixel released Kaleidoscope and it featured Folder Comparison I had to check it out. To make a long story short it looks nice but for professional work it is unusable because it is not efficient.
Just to be clear hear I was only interested in the Folder Comparison and so I did not look at the other features like Image comparison and so your mileage might vary.
So what is wrong with Kaleidoscope? When I fired it up for the first time I already had a bad feeling because it brought up a window asking me to drag a file into it. This might be nice for a newbie but when I know what directory to compare I need to enter them quickly and efficiently. I also need to be able to adjust a directory file name where only a number has changed or a parent directory. Also Path Finder has a feature where I can copy the page from a file / directory to the clipboard and so I am must faster just copy the two folders into it that way. Now it could be that Kaleidoscope uses Services to accomplish the same.
FInally the thing that killed it for me was the folder comparison view itself. In order to work fast I need to be able to see the changed files quickly even if they are several folders down. All of my projects use a hierarchical many folders deep and so comparing one folder at a time it unacceptable. This might work for simple web applications but not for me.
Granted I did not give Kaleidoscope a thorough test to see if there are other features that might alleviate these shortcoming or if there are other ways to go around them. That said I have a tool that works well and so without any further incentives I cannot waste more than 15 to 30 minutes on a tool evaluation. In addition Back Pixel’s webpage about Kaleidoscope is too simple to convince me to spend more time on it. Their website looks like their app. A nice UI but not enough meat on the bone.
Cheers – Andy
Remember the Coach Session with Steve Jobs
This post should actually be titled: why I am not interested in the Surface. Actually I am not even interested to have a look at it in the first place. From what I can see and what Microsoft showed in Ads and PR events is that this is a strange form of a Laptop and not much of a tablet at all.
Now this brings me back to the title. As John Gruber pointed out in the first iPad event review is that when Steve sat down on the coach to showcase the iPad then it wasn't a marketing gag but an excellent way to illustrate that the iPad isn't a laptop in disguise but a device that is used in a different and new way. The iPad is different like my Mac Air is different from my Mac Pro. The Air I can carry around, sit on the coach and work wherever I sit down. The Pro is at my desk, fast, quiet and with a lot of horse powers but I cannot use it anywhere else. The iPad is not a laptop because I only can work on one App at the time, it doesn't have a physical keyboard and the Ram / CPU is limited. On the other hand I can use it quickly to browse the web, read emails, even write documents and make music if I don't want or can't have a laptop with me. The iPad is not going to replace my laptop or even my XBox but for what I am using my iPad it is the best device.
From what I heard and saw the Surface is a tablet / laptop hybrid and doesn't seem to be good in either category. It is fairly big, heavy, slow and it seems only to work nicely if used like a laptop. It also looks like the some of the components are so hard to select because the target area is too small. At the end the most important reason not to get a Surface is its OS. 7 years ago I switched over to Mac OS X and never looked back. Every time I have to use a Windows computer I try everything to avoid using it or at least limit as much as possible. And so I think the Surface will be the same compared to the iPad or even worse. In addition I don't buy an iPad because of the OS but because of what I can do with it meaning what Apps I can get and there the Surface and Android are lacking good and useful Apps. I use regularly Blogsy, Byword, Omnifocus, Tweet- and Netbot, Wikibot, Webex, PDFPen, Instapaper, PlainText, Safari, Mail and some Games. Therefore just Office wouldn't cut it for me.
FInally I just want to be clear that this isn't a Surface review but my reasons why I don't even give Microsoft a chance to present the Surface. Not only is the nearest Microsoft store an hour away but I really don't need or want the Surface. At the end I don't trust Microsoft that the Surface would be a great product but rather feel that they rushed the release because of market pressure which means that early adopters are punished because of the immature product they buy.
– Andy
Saving Money the Wrong Way
Today I was with a client and initially everything went well until we suddenly got strange errors building a project using Jenkins. Looking at the log file it sure looked like Subversion was corrupt and we started to investigate. Of course, this happened at the last part of the project before going life and so time is precious.
After some back and forth it turned out that we just ran out of disk space because we created a few more jobs on Jenkins depleting all remaining disk space on an 8GB partition. Yes, right, a 8GB partition for /var which is so bad. For sure we could blame the installer of Jenkins just to use the Jenkins RPM and not configure Jenkins to use a more spacious partition but at the end of the day creating a /var partition on a linux server with 8GB is way too low. At the end of the day it took 3 people 3 hours (or more) to fix this mess which means we could have bought a Drobo drive with enough disk space to given every virtual machine at least 1 TB.
At the end of the day I don't understand how companies can underpower and underequip their development servers. Naturally things go wrong when we use the equipment the most and that is right before going live where you can afford a downtime the least. Beside the costs of the fixing it it also puts another stressful event on the development team leading to more errors, frustrations and eventually to further delays.
Powerful and reliable hardware and software isn't a treat but an essential component of a successful project. Having developers that cost between 10 to 20k per month excellent hardware is a drop into the bucket to the overall costs. 2 to 3k for hard- and sofware is less than one week of employment. And believe me a week delay in a project going live is on-time in my book.
– Andy
Logitech Ultrathin Keyboard Cover for the iPad
Update: Another week later and I am pretty pleased with the combo. Not only is writing so much more enjoyable but I also take my combo to more places and therefor I used even more. Now it pays off that I have an iPad with LTE making working online a breezy and pretty darn quick. Even when I am at a place with free Wifi I often ditch it because LTE is so much faster like on Airports or Startbucks. Up to know I never ran out of battery on the keyboard and I'll charge it everytime I charge the iPad. Last weekend I saw that Costco is selling the keyboard cheaper than at the Apple store but I would never have bought it there. My experience with electronics from Costco is that its hardware is in buggier and dies quicker than hardware from the Apple store.
Update: I am using the Keyboard for now a week and it already paid for half of its cost. Waiting at the Optomotrist for around half an hour and so I started writing a documentation for my current project using Byword. After I came home I got the document through Dropbox and included it into the final document. Because it works so well I bought Textastic to see how easy or difficult it is to develop code with the keyboard. For now the only problem I see with that is that the code has to be placed on Dropbox or an FTP server which works for smaller projects but for bigger projects with GIT that might become a space issue.
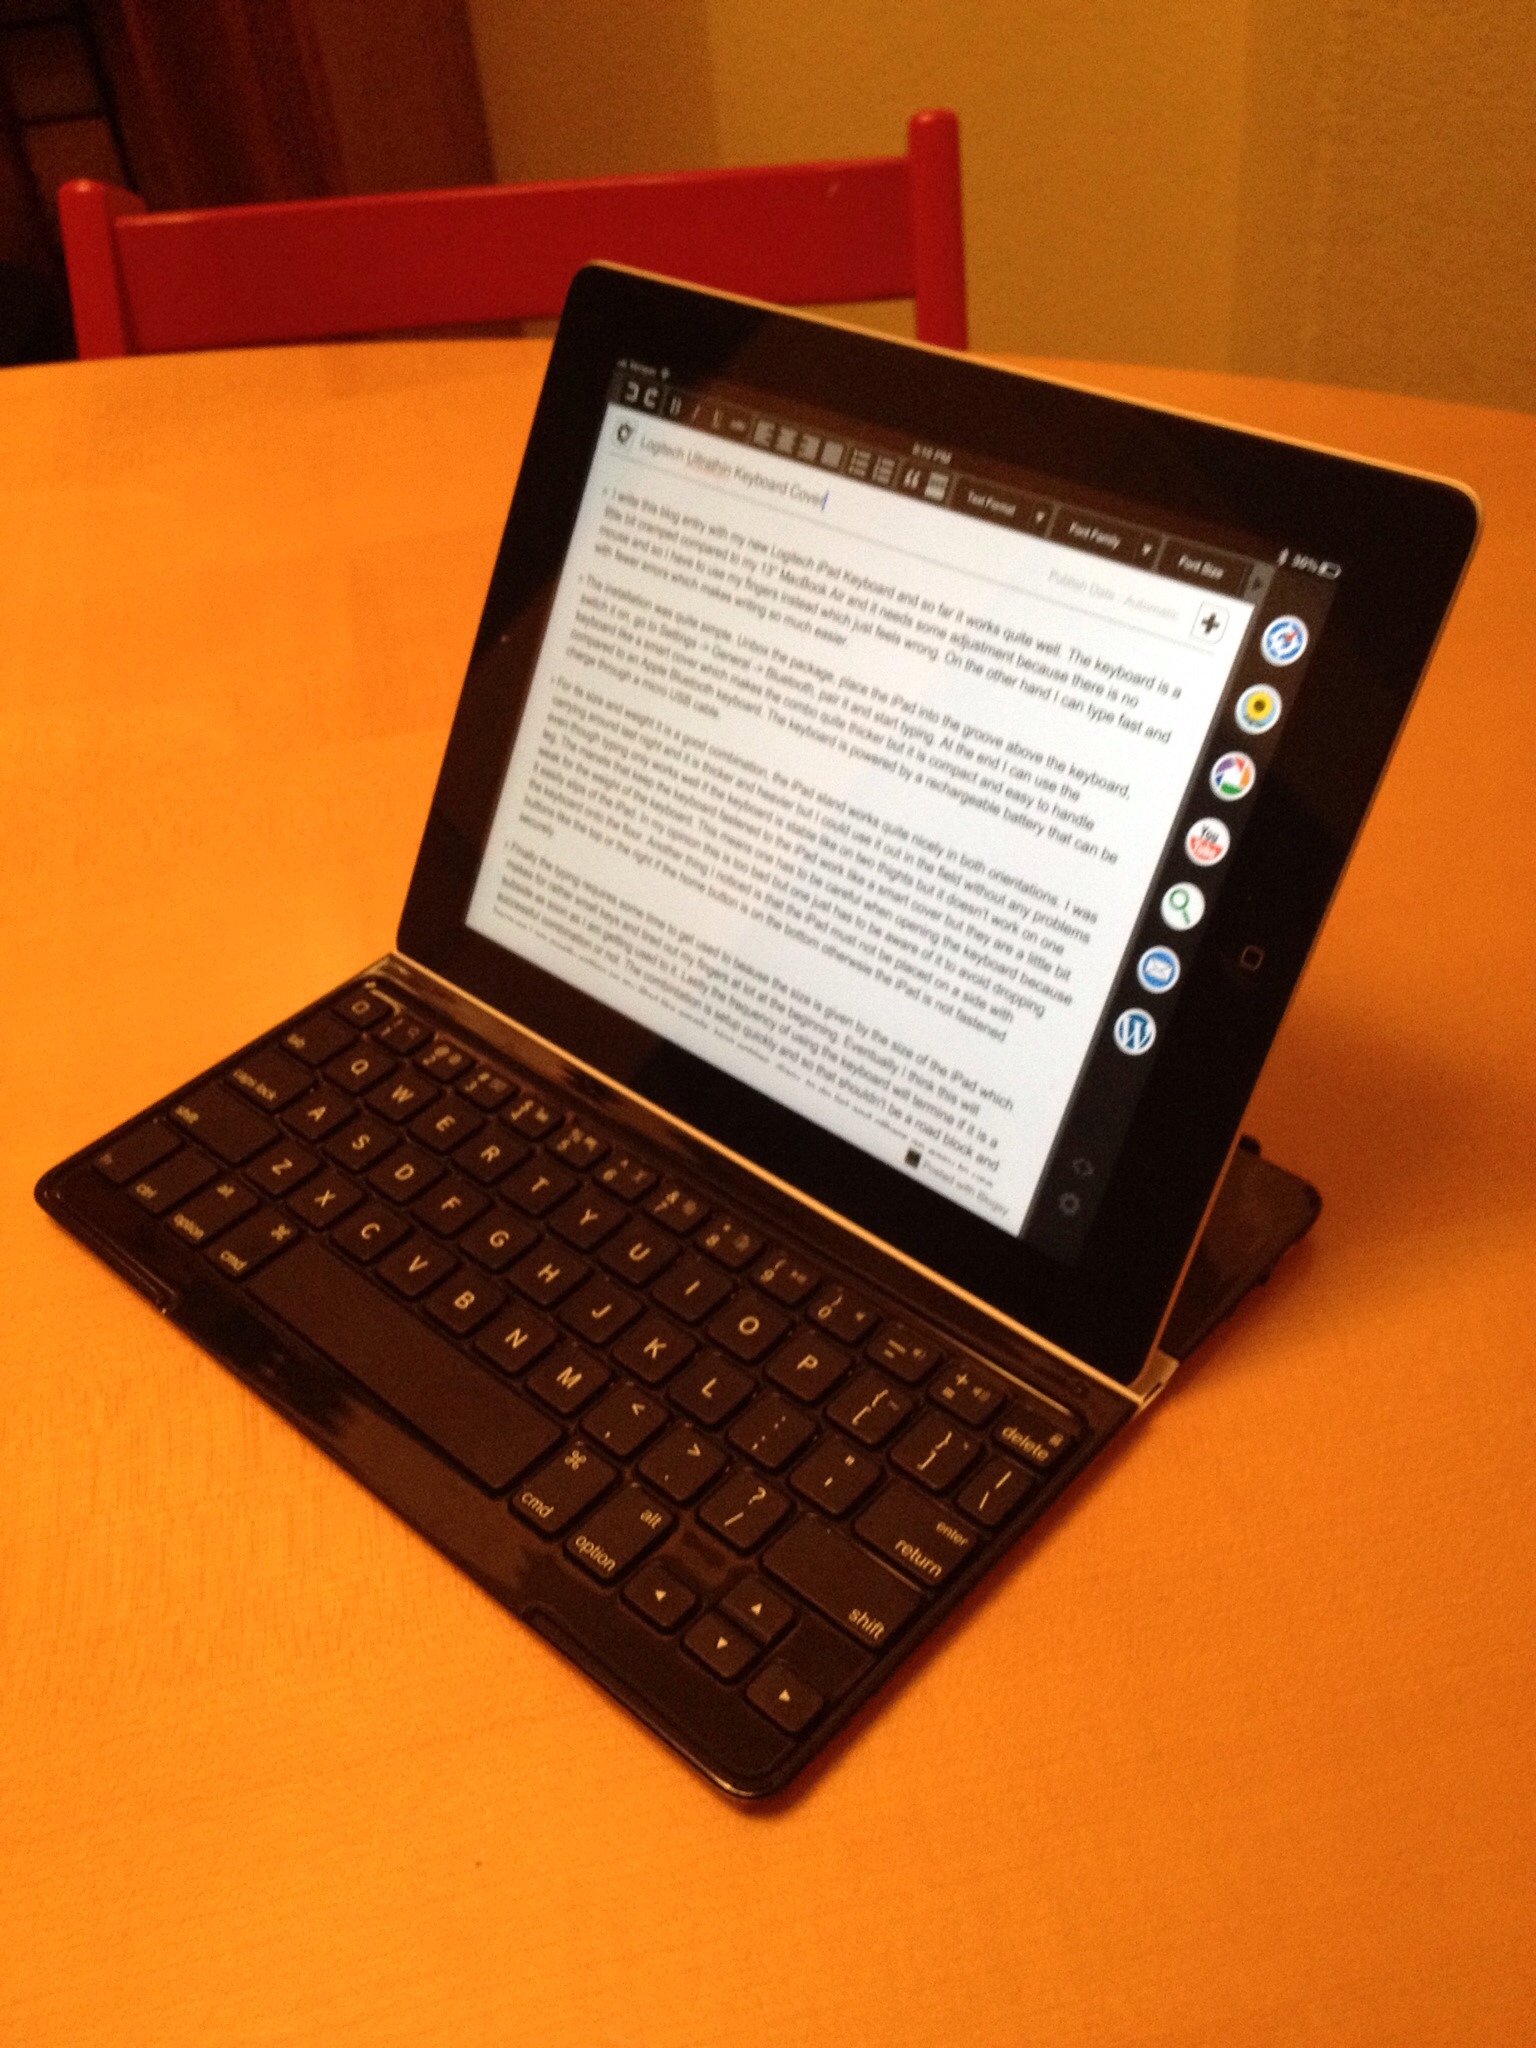
I write this blog entry with my new Logitech iPad Keyboard and so far it works quite well. The keyboard is a little bit cramped compared to my 13'' MacBook Air and I need some adjustment because there is no mouse and so I have to use my fingers instead which just feels wrong. On the other hand I can type fast and with fewer errors which makes writing so much easier.
The installation was quite simple. Unbox the package, place the iPad into the groove above the keyboard, switch it on, go to Settings -> General -> Bluetooth, pair it and start typing. At the end I can use the keyboard like a smart cover which makes the combo quite thicker but it is compact and easy to handle compared to an Apple Bluetooth keyboard. The keyboard is powered by a rechargeable battery that can be charge through a micro USB cable.
For its size and weight it is a good combination, the iPad stand works quite nicely in both orientations. I was carrying around last night and it is thicker and heavier than just the iPad but I could use it out in the field without any problems even though typing only works well if the keyboard is stable like on two thights. The magnets that keep the keyboard fastened to the iPad work like a smart cover but they are a little bit weak for the weight of the keyboard. This means one has to be careful when opening the keyboard because it easily slips of the iPad. In my opinion this is too bad but one just has to be aware of it to avoid dropping the keyboard onto the floor. Another thing I noticed is that the iPad must not be placed on a side with buttons like the top or the right if the home button is on the bottom otherwsie the iPad is not fastened securely. The best way is to lay down the combo with the keyboard at the bottom, lift up the iPad, take it off the hinges and place it into the groove. The groove seems to have magnets, too, keeping the iPad securely in place.
The typing requires some time to get used to beause the size is given by the size of the iPad which makes for rather small keys and tired out my fingers at lot at the beginning. Eventually I think this will subside as soon as I am getting used to it. Lastly the frequency of using the keyboard will termine if it was a good purchase or not. The combintation is setup quickly and so that shouldn't be a road block and because I am mostly writing on my iPad like emails, blog entries, diary, to do lists and others an easy to use physical keyboard should be a heaven send. But as often the little details are deciding if it works out or not.
Here is a picture on the combo in action:
Here a comparison of the combo versus a MacBoor Air 13'':

– Andy
My Way to Paperless
This is my account of going paperless. I will update the post when there is something going on. The parts will be in reverse order so that you always have the latest first.
July 21st: Hazel
Lately I didn't have much time to spare for this project but we started to use the scanner more often. Rather than to fret what to do with a document we just throw it into the scanner and then drop it into the delayed shredder bin. We can sort out where to place it later.
For that matter doing my travel receipts is much easier now. Just scan the receipts, open the resulting PDF into PDFpen, add the electronic invoices like flight tickets and the spreadsheet with the receipts summary and I'm done.
I was briefly using Hazel to see how it works and it should do the trick even though it's probably a little bit tougher to create good rules and we might spend more time manually name the documents. For example the receipts document is very hard to create a good Hazel rule for but I think using TextExpander instead should speed up the naming process enough to keep it efficient.
July 12th: Getting Ready
If my wife hadn't started to work full time we probably would still use papers even though in my job I started to use less and less paper a few years back. The last time we bought a new house and sold our old one we started to use PDFs, Dropbox and PDFpen to sign and share most of the documents with our realtors.
With the dawn of paperless billing keeping all invoices, business paperwork and receipts in one place is becoming more and more of a challenge. What I don't want is to search all my documents in multiple places rather than just open my computer and search for it.
In the beginning of 2012 my wife and I started to talk about going paperless but it took nearly another 6 months to put it in place. I knew that my printer/scanner combo wasn't good enough to scan efficiently nor was a simple PDF image of my documents going to help us cataloging and searching the documents efficiently. When I bought PDFpen I saw the power of OCR to convert a document into searchable text. Then I started to share sensitive documents about our house transaction with our realtors over Dropbox and later used CrashPlan for an online backup. The only missing so far was how to automate the scanning, sorting, syncing and backing up of our documents.
In order to make everything work well all our documents are stored on a central location with a minimal effort to convert into searchable documents and automatically sorter based on its content, at least for recurring documents. Having already a Mac Mini Server adding a great scanner to it, scan and sort the documents into a shared folder on the server looks very promissing. Finally I can use CrashPlan to backup these folder(s) and the only thing I need to figure out if I want to encrypt the documents locally before the are backed up.
The only missing piece is the automatic sorting and for the Mac the solution seems to be simply Hazel. With this tool I can automate actions on files bases on various features like file name, properties, Spotlight comments, content and more. In order to trigger Hazel I need to place my documents into a folder no matter if it was scanned or arrived digitally. Hazel will check the content and move, rename, add tags etc on all documents it understands. The rest will remain in the original folder and we need either to create new Hazel rules or just rename / move them manually.
Even though we didn't start yet I want to collect paper documents in our office in a bin then periodically scan them except I need the documents right away like receipts. After a given time I want to check if I still can find some random documents and if found I will shred the paper.
Because the scanner is a very important piece we bought a Fujitsu SnapScan S1500M and after a few tries I can scan a document in seconds. The Fujitsu software is then running OCR in the background and places the PDF into our central folder. This is dead simple because the scanner scans both sides in one pass, uses a sonic sensor to make sure it did not scan two pages together and the OCR is pretty good. The only thing I need to figure out is how to place multiple pages in on PDF file. So far I see two solutions, either I scan one document at the time and let the software combine them into one document or I scan all pages as one document and combine them later with PDFpen manually. Even though the scanner ran obout $440 it is a great investment to go paperless.
– Andy
Alfred Powerpack: Bad Business Model?
Today I got an email from Alfred (Mac OS X app launcher) that Alfred is now two years old and to celebrate they offer the Powerpack with a 10% discount. I was thinking about buying it and it sounds reasonably priced but not with the limitations.
If I buy the current version it will run with 1.x release of Alfred which just turned two. That said I have no idea when they will release version 2.x. This prevents me from actually buying it or let’s say it this way it makes they price rather unreasonable. I paid more for software but all of them do more like Omnifocus, Omnigraffle, Pixelmator etc.
To make it work for me the Alfred team either needs to give us an idea how long 1.x is the current version or limit the time the license is valid like 2 years.
Finally the mega-support license is great but then how long will be Alfred around so that my investment is worthwhile.
For now I use the free but limited Alfred without the Powerpack.
– Andy
MacBook Air Arrived and Ready
Yesterday my new MacBook Air arrived and I started to set it up. Going to a smaller device I did not copy the content of my original 17-inch laptop over but started from scratch again.
Funny thing today is that I got an email from Apple that the Air was shipped even though I received it yesterday and the first delivery was made two days ago. So it seems that Apple had a problem with my shipment but at least I got it and it is working perfectly.
The first thing that amazed me was how light it is. Carrying it around compared to the 17-inch is a breeze. The overall speed is quite slower but not enough to be a drag. Of course creating or extracting large ZIP files is progressing a lot slower but that isn’t my daily business. Developing on CQ5.4 from Adobe (Day) is comparable and still beats my current Dell desktop at my workplace.
Having the Air connected to my 27-inch monitor it nearly feels like the 17-inch and so working at home with the Air is more or less the same. On the road the screen is small but because of that easy to use in a car or plane. If I am on-site it might be a little bit small for regular development but for now I rarely do that.
The only thing that baffles me a little bit is that the Activity Monitor is showing for CPUs for a Dual Core i5:

For now the only reason why I would go back to my 17-inch is if I need to have a powerful development machine away from my home and there is no way I could have an external monitor with a better resolution that the Air which is pretty good with 1440×900.
– Andy